时间:2023-06-07 15:17
人气:
作者:admin
这次简单的给PY32移植一下RT-Thread Nano
开发板:PY32F003_StartKit (PY32F003F16U Flash 32K SRAM 4K)
IDE:MDK5
1.准备工作
这里bsp我直接使用厂商提供的bsp,原本想要直接选择芯片自己新建工程的,但是根据官方的教程一直没有成功于是就直接用现成的bsp了
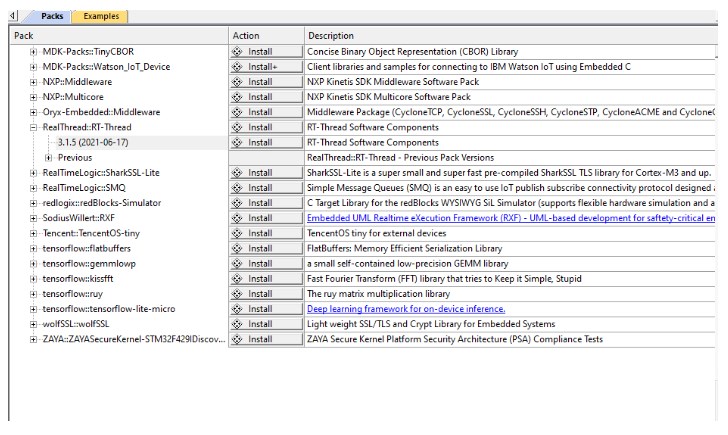
下载:点击Pack installer
选择RT-Thread进行下载
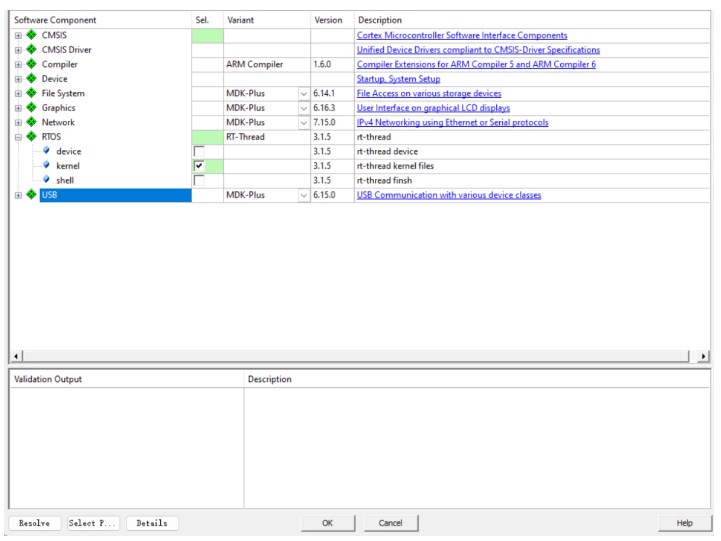
Manage Rum-Time Environment,本次我们就只移植kernel,shell暂时我还用不上所以就先不移植了
2.清除重定义
rt-thread在运行过程中会使用到HandFault_Handler和PendSV_Handler用于线程切换,异常处理,所以需要将py32f0xx_it.c中的这两个函数删除,否则链接时会提示重定义
还有mdk中main函数的入口函数extern int Super$main(void);原来是在system_py32f0xx.c中实现的,rtthread也进行了接管在启动流程中是如下流程
rt_application_init->main_thread_entry->Super$main(void),所以我们需要把system_py32f0xx.c中的删除
3.完成rt_hw_board_init
void rt_hw_board_init(void)
{
/*
TODO 1: OS Tick Configuration
Enable the hardware timer and call the rt_os_tick_callback function
periodically with the frequency RT_TICK_PER_SECOND.
*/
/* Call components board initial (use INIT_BOARD_EXPORT()) */
HAL_Init();
APP_SystemClockConfig(); // 配置系统时钟
SystemCoreClockUpdate(); // 对系统时钟进行更新
SysTick_Config(SystemCoreClock / RT_TICK_PER_SECOND);
#ifdef RT_USING_COMPONENTS_INIT
rt_components_board_init();
#endif
#if defined(RT_USING_USER_MAIN) && defined(RT_USING_HEAP)
rt_system_heap_init(rt_heap_begin_get(), rt_heap_end_get());
#endif
}
4.修改内存堆
因为这个芯片sram很小所以我这里就给了2KB
#define RT_HEAP_SIZE (2*1024)
static rt_uint8_t rt_heap[RT_HEAP_SIZE];
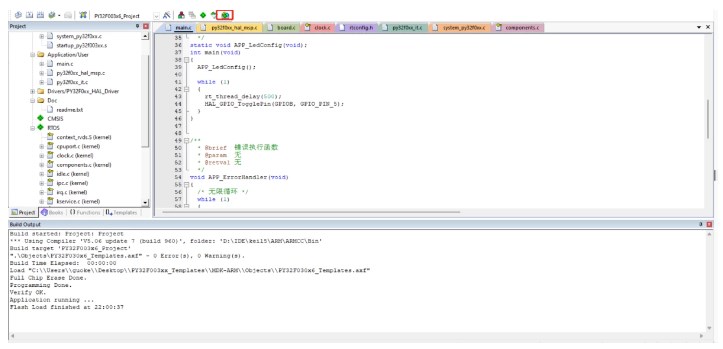
5.愉快的点灯
/**
@file main.c
@author MCU Application Team
@brief Main program body
All rights reserved.
All rights reserved.
This software component is licensed by ST under BSD 3-Clause license,* the "License"; You may not use this file except in compliance with the
License. You may obtain a copy of the License at:
opensource.org/licenses/BSD-3-Clause
*/
/* Includes ------------------------------------------------------------------*/
#include "main.h"
#include
/* Private define ------------------------------------------------------------*/
/* Private variables ---------------------------------------------------------*/
/* Private user code ---------------------------------------------------------*/
/* Private macro -------------------------------------------------------------*/
/* Private function prototypes -----------------------------------------------*/
/**
@brief 应用程序入口函数.
@retval int
*/
static void APP_LedConfig(void);
int main(void)
{
APP_LedConfig();
while (1)
{
rt_thread_delay(500);
HAL_GPIO_TogglePin(GPIOB, GPIO_PIN_5);
}
}
/* *
@brief 错误执行函数
@param 无
@retval 无
*/
void APP_ErrorHandler(void)
{
/* 无限循环 */
while (1)
{
}
}
static void APP_LedConfig(void)
{
GPIO_InitTypeDef GPIO_InitStruct;
__HAL_RCC_GPIOB_CLK_ENABLE(); /* GPIOB时钟使能 */
GPIO_InitStruct.Pin = GPIO_PIN_5;
GPIO_InitStruct.Mode = GPIO_MODE_OUTPUT_PP; /* 推挽输出 */
GPIO_InitStruct.Pull = GPIO_PULLUP; /* 使能上拉 */
GPIO_InitStruct.Speed = GPIO_SPEED_FREQ_HIGH; /* GPIO速度 */
HAL_GPIO_Init(GPIOB, &GPIO_InitStruct); /* GPIO初始化 */
}
#ifdef USE_FULL_ASSERT
/* *
@brief 输出产生断言错误的源文件名及行号
@param file:源文件名指针
@param line:发生断言错误的行号
@retval 无
*/
void assert_failed(uint8_t *file, uint32_t line)
{
/* 用户可以根据需要添加自己的打印信息,
例如: printf("Wrong parameters value: file %s on line %d\\r\\n", file, line) */
/* 无限循环 */
while (1)
{
}
}
#endif /* USE_FULL_ASSERT */
/** ********************** (C) COPYRIGHT Puya END OF FILE *************/
结果:LED亮灭500ms.


 关注微信
关注微信