时间:2022-08-01 09:14
人气:
作者:admin
霍尔传感器应用非常广泛,本文以A3144开关型霍尔传感器为例,介绍霍尔效应传感器以及A3144与Arduino UNO的连接,通过红色LED闪烁检测其附近是否有磁场存在。项目BOM如下:
A3144霍尔传感器 x1
Arduino UNO开发板 x1
红色LED x1
220欧姆电阻 x1
面包板 x1
跳线 若干
霍尔传感器(Hall Effect Sensor)是根据霍尔效应制作的一种磁场传感器,每一侧都可以检测到一个特定的极点,具有无触点,在开关状态时无火花,不产生干扰,使用寿命长,灵敏度高等特点。由于它适用于晶体管逻辑,因此可以轻松地与微控制器接口,应用非常广泛。
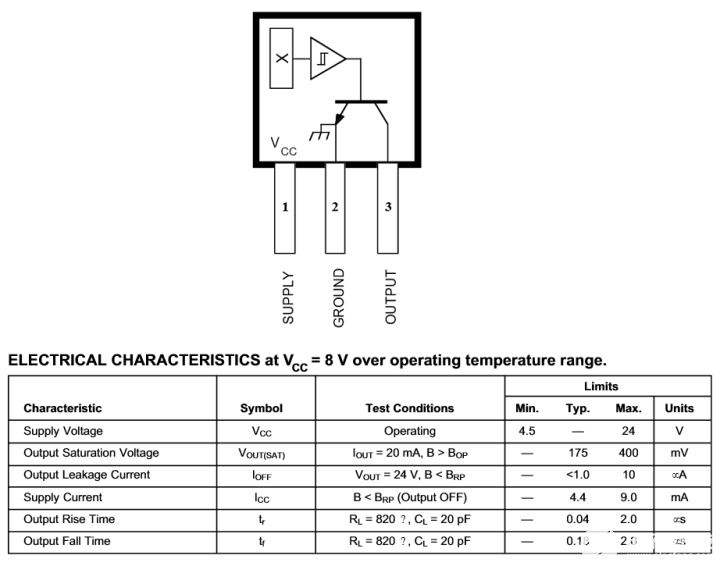
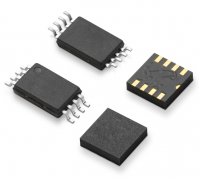
霍尔效应传感器有两种主要类型,一种提供模拟输出,另一种提供数字输出。A3144霍尔传感器是Aleg MicroSystems生产的宽温数字输出传感器,由电压调整电路、反相电源保护电路、霍尔元件、温度补偿电路、微信号放大器、施密特触发器和OC门输出级构成,通过使用上拉电路可以将其输出接人CMOS逻辑电路。该芯片具有尺寸小、稳定性好、灵敏度高等特点:
- 汽车级或工业应用极的稳定性和温度特性
- 4.5V至24V工作电压,仅需稳压电源
- 集电极开路25mA输出,与数字逻辑兼容
- 电池反接保护
- 可以检测市面上绝大多数的小型永磁体
- 体积小
- 耐物理压力
- 工作温度范围可达-40℃~150℃。
A3144有+5VCC、GND、Signal三个引脚,如果检测到磁体输出将变低电平,否则输出将保持高电平。
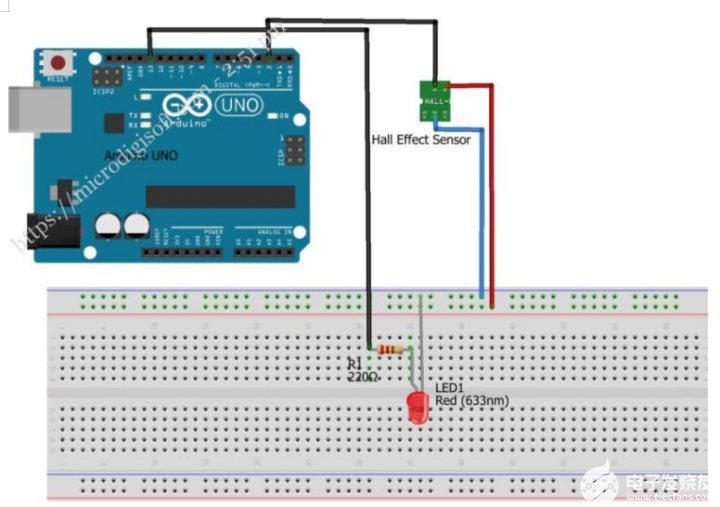
A3144与Arduino UNO开发板的连接非常简单,只要将其信号引脚与Arduino任意数字引脚连接,就可以读取传感器的状态了。
本项目的代码如下:
const int hallPin = 2 ; // initializing a pin for the sensor output
const int ledPin = 13 ; // initializing a pin for the led. Arduino has built in led attached to pin 13
// variables will change
int hallState = 0 ; // initializing a variable for storing the status of the hall sensor.
void setup ( ) {
pinMode ( ledPin , OUTPUT ) ; // This will initialize the LED pin as an output pin :
pinMode ( hallPin , INPUT ) ; // This will initialize the hall effect sensor pin as an input pin to the Arduino :
Serial.begin( 9600 ) ;
Serial.println ("HALL SESNOR WITH ARDUINO") ;
Serial.println ("Testing the analog hall sensor module:");
}
void loop ( ) {
hallState = digitalRead ( hallPin ) ; // reading from the sensor and storing the state of the hall effect sensor :
if ( hallState == LOW ) { // Checking whether the state of the module is high or low
Serial.println ("The state of the analog hall module is high");
digitalWrite ( ledPin , HIGH ) ; // turn on the LED if he state of the module is high
}
else {
digitalWrite ( ledPin , LOW ) ; // otherwise turn off the LED :
Serial.println ("The state of the analog hall module is low ") ;
}
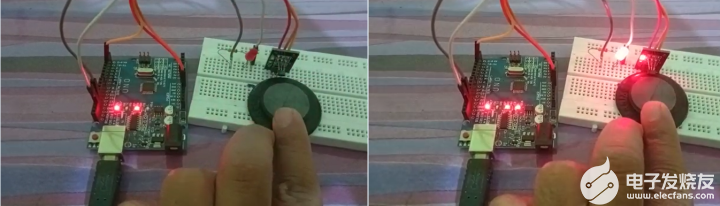
将这些代码上传到Arduino IDE后,就可以读取传感器的状态数据了。磁体靠近A3144霍尔传感器,LED将点亮,离开后将熄灭。也可将LED换成蜂鸣器,磁体靠近A3144霍尔传感器,蜂鸣器将鸣响,离开后将静默。
审核编辑:汤梓红
上一篇:压力传感器在扫地机器人上的应用


 关注微信
关注微信